Parallel Channel

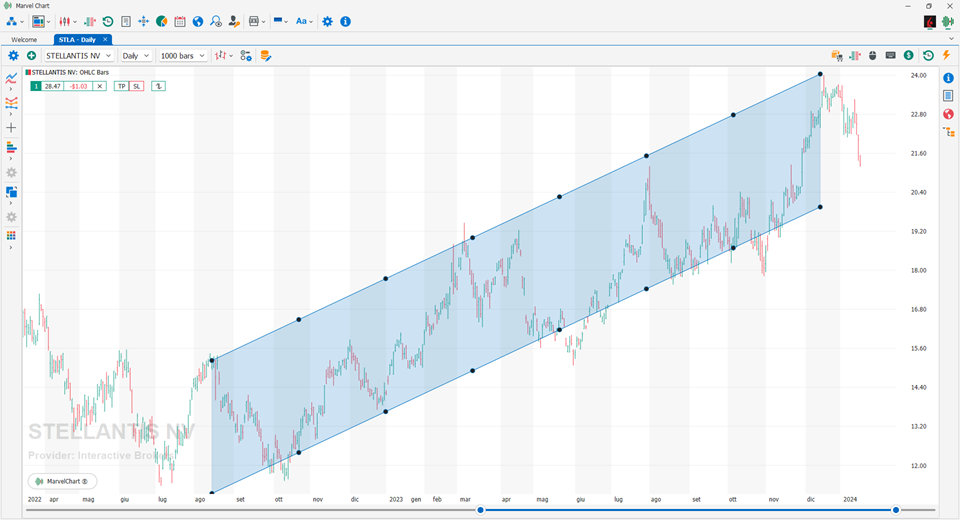
It represents a channel made up of 2 parallel lines that delimit a work area. To add the channel to the graph, simply click on the position on the graph where you want to place it, hold down the mouse button and move towards the second control point that determines the ends of the first of the two parallel lines, and release the button. Now moving the mouse vertically determines the position of the second parallel line, whose inclination will always be the same as that of the first. A further click with the left mouse button fixes the position of the second line and completes the channel insertion procedure. After adding the channel to the graph, you can modify it by clicking on one of the control points to select it and then dragging it to the new position while holding down the left mouse button. The size of the channel can be changed holding down the CTRL key and moving one of the control points.
Settings

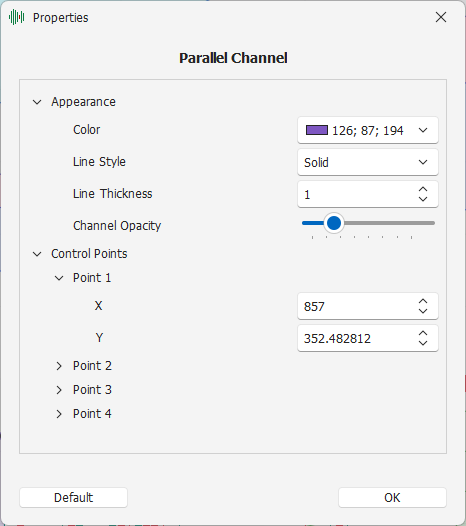
Appearance - Settings related to the drawing mode
Color - Color of the lines
Line Style - Lines drawing style
Line Thickness - Thickness of the lines
Channel Opacity - Opacity of the channel enclosed by the lines
Control Points - Control points of the channel
Point 1 - First control point of the channel
X - Position relative to the X-axis, expressed as a bar number
Y - Position relative to the Y-axis
Point 2 - Second control point of the channel
X - Position relative to the X-axis, expressed as a bar number
Y - Position relative to the Y-axis
Point 3 - Third control point of the channel
X - Position relative to the X-axis, expressed as a bar number
Y - Position relative to the Y-axis
Point 4 - Fourth control point of the channel
X - Position relative to the X-axis, expressed as a bar number
Y - Position relative to the Y-axis